This week we present Block 5 of our mutual Zen Chic Block of the Month sew along. It’s a challenging block containing a twelve points compass that requires paper piecing, curved seam and appliqué in the center.
The compass ring is done with the paper piecing method
First, print out the template. Make sure you check "actual size" on the printer dialog and measure the 1" proof square to double check the right size. Then glue the sheets together. Cut out the compass ring from the paper template. (Note: for some reason the computer application didn't create a 1/4" seam to the paper compass ring, so please add that extra 1/4" on the inner and outer ring outline. I used my compass to draw these two extra lines) (tutorial pic 1).
If you have no experience with foundation paper piecing, this video will give you a basic understanding.
You will notice in the block intructions that some of the measurements are in blue letters - it means: cutting instruction includes seam allowance of 1/2" instead of the standard 1/4". This extended seam allowance makes paper piecing easier because you can place the piece of fabric more roughly on its determined place and trim it off later to the perfect size.
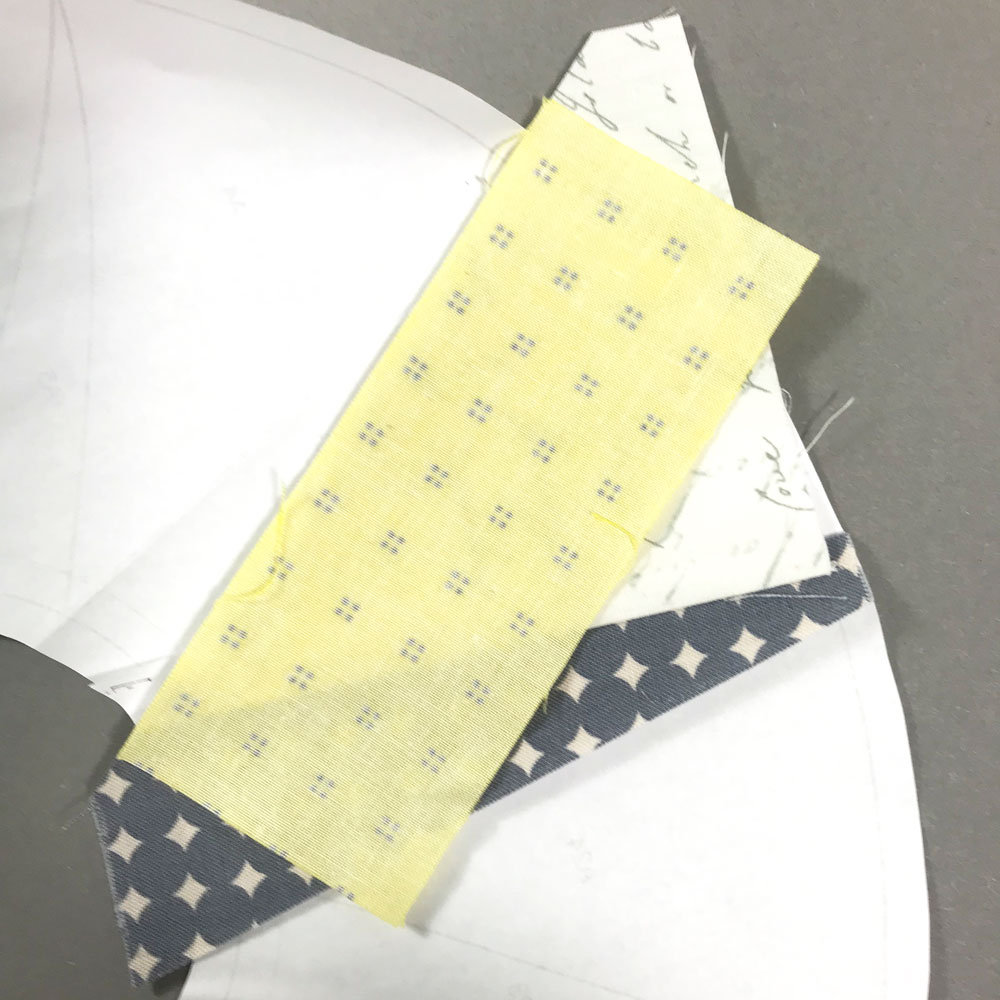
To help you understand how I placed my first fabrics and seam, I traced my first beam (pointer) onto the blank side of the ring and added a dashed line to indicate the seam allowance (tutorial pic 2). So I placed my first colored piece of fabric (2" x 5") right side up onto the beam, making sure that the edge matches the dashed line (tutorial pic 3). On top I placed a piece of low volume (4" x 5") wrong side up, edges matching. Place the low volume so it covers just the tip of a beam, otherwise it might be a bit too short to cover the inner seam allowance (or cut it 4" x 5 1/2") (tutorial pic 4).
For this tutorial I didn't care about print direction or so, just used some of my scraps from HEY DOT. So please don't care of that. Now I stitched them down on the marked line. If you press the pair open, you will see, that both rectangles cover the edges of the compass' triangles. Now you trim them to the right size including seam allowances (tutorial pic 5) and add the next piece of fabric (tutorial pic 6). In the same manner work around the ring until you have sewn on nearly all pieces. Now cut through the ring on a marked line, so it becomes open (tutorial pic 7). Once you have sewn on all single pieces, close the ring by placing the both open ends right sides onto each other and stitching them together with 1/4" seam (tutorial pic 8).
Carefully cut out the the pieced ring along the marked seam allowance line, (tutorial pic 9) remove paper.
How to do appliqué
Use a fussy cut for the central circle. Follow the instructions on the pattern, if you haven't done hand appliqué before, you will find a detailed appliqué instruction in the appendix of the quilt pattern.
How to do the curved seam
To add the outer frame to the compass ring you have to carefully pin the right sides together and sew along the curve. The quilt pattern gives you pictures and instructions. One more hint: It might be a good idea to add 1/2" or 3/4" of a seam allowance on the straight edges of the outer corner pieces. This allows you to trim the finished block to the perfect size after sewing the ring in.
Have fun sewing this compass block and share your results with the other quilters of our Zen Chic BOM sew along using our hashtag #SPOTTEDMOREPAPER on instagram and our facebookgroup.
You still need the BOM quilt pattern to join our Zen Chic Sew Along? Follow the links below for all related blog posts and download the instructions right here:
Get the Block of the Month Quilt Pattern
This is a PDF-pattern and not a brochure! Store the file to your desktop computer. I can’t recommend mobile devices for saving the file. (Keep in mind: The download expires after 1 week or 3 attempts)
ALL BLOG POSTS FOR THE BOM
Cutting your fabrics with triangle templates a bonus download
Cutting diagrams for yardage, bonus download


